
Animate symbols, text, and layers with Tween
Verification record: Umoupen 0.9.61 build 652 (2026-10-17) · Verification scope
Tween creates motion by automatically filling in values between specified times. A keyframe (key) records values such as position, scale, or rotation at a particular time. Calculating values between keys is called interpolation. The setup differs for Symbols, Text objects, and whole layers.
| Target | Setup |
|---|---|
| A Symbol or Text object | Enable Tween and add keys within one frame’s exposure |
| A whole layer | Choose Layer in Move Properties and enable Animate |
Symbol and Text tweens change the placed object’s values; they do not generate new drawings between separate frames.

Keys belong to a Symbol instance, a Text object, or a layer.
Location: Timeline → Tween / Tween Editor
Shortcut (macOS): ⌘T (Tween Editor)
Shortcut (Windows): Ctrl+T (Tween Editor)
Choose between the two editors
Section titled “Choose between the two editors”Opening the Tween Editor reveals the property list and an editing area. Switch that area between the Keyframe Editor and the Curve Editor.
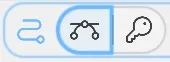
| View | What the display shows | When to use it |
|---|---|---|
| Keyframe Editor | Property rows and diamonds marking the frames that contain keys | Check which properties have keys and when; move a key to change its time |
| Curve Editor | Property values over time, or an easing curve | Inspect and adjust where values rise or fall and how their rate of change varies |
View the same tween in both editors
Section titled “View the same tween in both editors”Both screenshots show Symbol 23 on the same layer at frame 37. Its existing keys are at frames 17 and 57.
Keyframe Editor
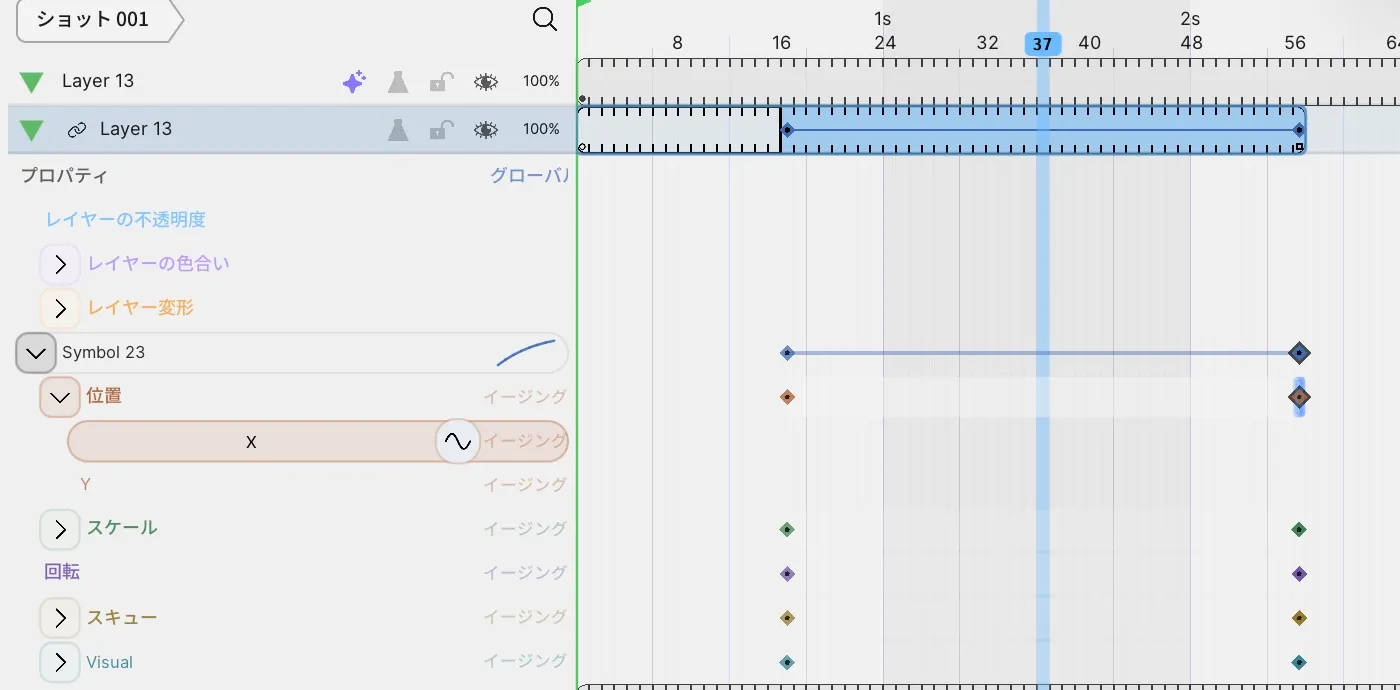
The horizontal axis shows frame positions. The rows represent properties such as Position, Scale, and Rotation; a diamond’s height does not represent its numeric value. Right-click a key to open the copy, cut, paste, and delete menu.
Curve Editor
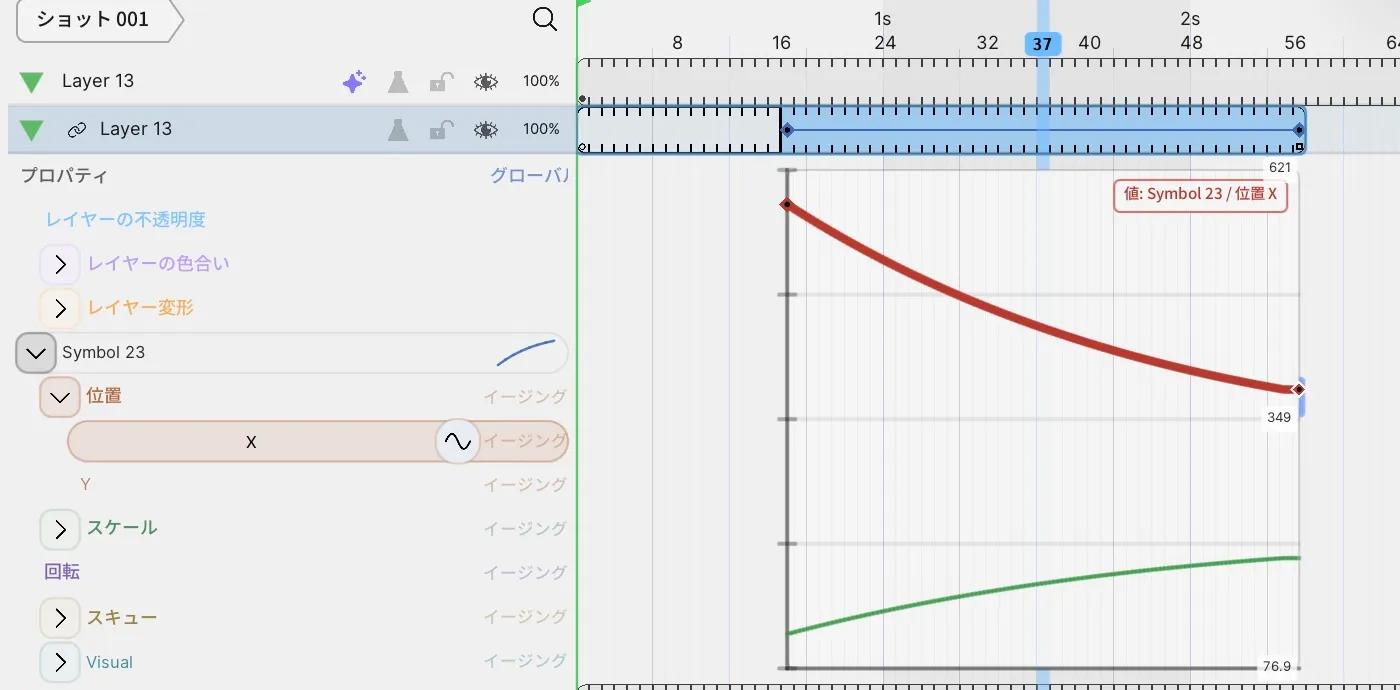
Select Symbol 23 → Position → X to display Value: Symbol 23 / Position X in the graph. Here, the vertical axis represents numeric values. The descending red curve means X decreases. Where the curve flattens toward the end, X changes by less per frame.
Move a key to change when a property reaches its end value
Section titled “Move a key to change when a property reaches its end value”In the example above, select Position → X and drag the frame-57 key to frame 49 in the Keyframe Editor.
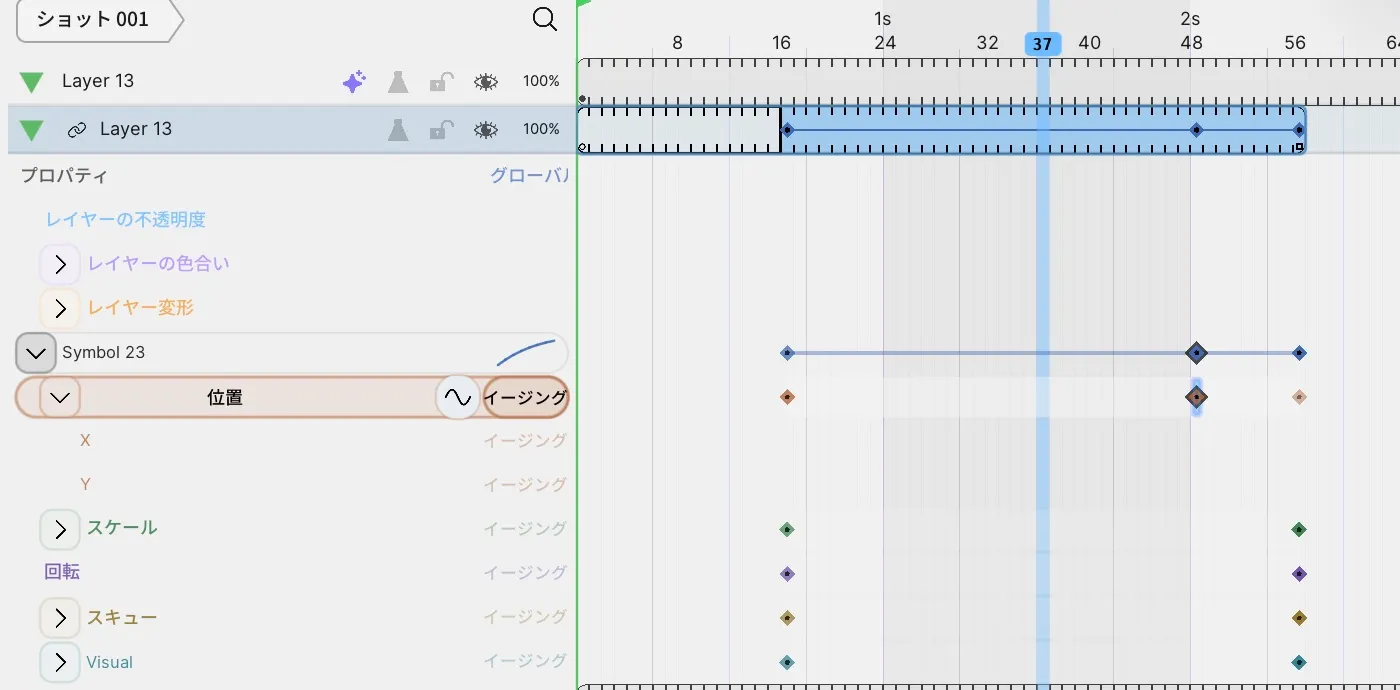
X reaches the same end value earlier. Keys for Scale, Rotation, and other properties remain at frame 57, so which property’s key you select matters. Use this to finish a property change earlier or offset its timing from other properties.
To keep the start and end frames while changing progress between them, adjust the curve handles.
Create the movement, then adjust its easing
Section titled “Create the movement, then adjust its easing”- Use the steps below to set the start and end keys and positions.
- In the Keyframe Editor, check the symbol name and the frames containing its keys.
- Switch to the Curve Editor and select the property to adjust for the same symbol.
- To slow only the start, continue with the Position X easing example.
Switching editors changes the view. The Tween on/off control and key modes that change how keys are organized are separate controls.
Before you start
Section titled “Before you start”For a Symbol or Text tween, prepare:
- A Symbol placed on the Stage, or a Text object
- One frame whose exposure spans at least two cells
To animate existing artwork, first convert it to a reusable Symbol.
Animate a Symbol from left to right
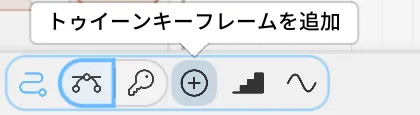
Section titled “Animate a Symbol from left to right”Use the circular + button at the bottom left of the Timeline to add a key.
- Place a Symbol from the Gallery on the Stage.
- Select its frame in the Timeline and press
4to extend it to the right until the exposure spans at least two cells. Do not add a new frame. - At the first cell of the exposure, choose Move and set the starting position.
- Turn on Tween in the Timeline.
Cmd+T/Ctrl+Tonly shows or hides the Tween Editor; it does not enable or disable Tween itself. - Move the playhead to a later cell within the same exposure. You cannot add a key at the first cell or outside the exposure.
- Choose Add Tween Keyframe, then use Move or Properties to move the Symbol to its ending position.
- Scrub or play the interval. The Tween is working when a blue band and diamond-shaped keys appear and the position changes continuously through the intermediate cells.
- To add another state between the endpoints, add a key at another cell within the same exposure and change its values.
Example: move the same drawing from left to right
Section titled “Example: move the same drawing from left to right”This project Symbol has a key at the left endpoint on frame 17 and another at the right endpoint on frame 57. The Tween fills in the positions between them. Playback pauses briefly at the right endpoint and repeats the motion twice.
Move a whole layer
Section titled “Move a whole layer”You can key the position, scale, and rotation of an entire layer without turning it into a Symbol. The values go into Layer Transform in the Tween Editor (Position X / Position Y / Scale X / Scale Y / Rotation / Skew).
- Choose Move, then choose Layer in Properties.
- Turn on Animate in the same Properties.
- Move the playhead to the frame that should get a key, then drag the layer to move, rotate, or scale it. Dragging adds a key at the current frame.
- Repeat on another frame, then play the interval.
With Animate off, dragging changes the layer’s rest pose without adding keys. Values that already have keys keep using their keys.
To remove the keys, select only that layer, right-click it, and choose Clear Transform Keys from the Transform Parent submenu. Reset Transform, in the same submenu, puts the layer back where it was drawn and removes its move, rotation, scale, and keys. The pivot and the Transform Parent stay as they are.
If the right-click menu starts with a count such as “3 Selected Layers”, more than one layer is targeted and the Transform Parent items do not appear. Clear the range selection in the Timeline and select only one layer. Inside a folder with Sync Layer Timing on, you cannot select just one child layer, so turn off the folder’s sync first.
If it does not work
Section titled “If it does not work”For Symbol and Text tweens, check the following conditions.
| Symptom | What to check |
|---|---|
| Tween controls are unavailable | Select a Symbol or Text object. Symbol Tween controls are not available directly on a Raster Layer. |
| You cannot add a key | Extend one frame’s exposure to at least two cells and move to a cell after the first one. |
| Nothing moves during playback | Do not create a new frame. Make sure the start and end values differ within the same exposure. |
Pressing Cmd+T / Ctrl+T does not create motion | This shortcut only shows or hides the editor. Turn on Tween separately in the Timeline. |
On a Raster Layer, Layer Effect values become available for Tween after you add a Layer Effect.
Make the motion read like it is on twos
Section titled “Make the motion read like it is on twos”Stepped Tween updates interpolated values every few frames instead of every frame, giving the motion the appearance of twos or threes. Key positions and values stay the same.
The label reads Stepped Tween (On) or Stepped Tween (Off) when toggled.
Move tween points elsewhere
Section titled “Move tween points elsewhere”You can cut interpolation points and paste them at another position.
- Select the tween points in the Tween Editor.
- Run Cut Tween Points or Copy Tween Points.
- Move the playhead to the destination and run Paste Tween Points.
Running the command without a selection reports Select tween points first, and pasting with nothing on the clipboard reports No tween points to paste. Interpolation points for layer effects use the same commands as effect points.
Move a group of tween keys
Section titled “Move a group of tween keys”Copy or move several tween keys to another frame while preserving their spacing.
- Select the tween keys in the Tween Editor.
- Copy them to keep the originals, or cut them to move the originals.
- Move the playhead to a frame with enough room for every copied key.
- Paste and check the spacing and values of the keys.
With no selected keys, Umoupen reports Select tween keys first. An empty clipboard reports No tween keys to paste. If the destination is too short, it reports Choose a frame with room for all copied tween keys.
Main commands
Section titled “Main commands”| Command | What it does |
|---|---|
| Tween | Enables or disables interpolation itself. |
| Tween Editor | Shows or hides the editing view for keys and tween intervals. |
| Add Tween Keyframe | Adds a key for the Tween at the current position. |
| Convert to frames on: | Appears when you right-click a range with a tween in the Timeline. Converts a Symbol tween into regular frames. Only Symbol tween keys can be converted. |
| Clear Tween Keys | Removes interpolation points. |
| Stepped Tween | Updates the interpolation every few frames so the motion reads like it is on twos or threes. |
| Cut Tween Points / Paste Tween Points | Moves the selected tween points to another position. |
| Cut / Copy / Paste Tween Keys | Moves a selected group of keys to another frame. |
| Clear Transform Keys | Appears in the Transform Parent submenu when you right-click a single selected layer. Removes the position, scale, and rotation keys of the whole layer. |
Adjust the speed of the motion
Section titled “Adjust the speed of the motion”After the basic motion works, use the Curve Editor to adjust acceleration, deceleration, holds, and overshoot between keys. The Curve Editor is not required to create the first Tween.
Add noise to a numeric property
Section titled “Add noise to a numeric property”Noise adds variation to a value. Here it is applied to the selected numeric property rather than directly to a motion path.
- In the Tween Editor, select a numeric property such as Layer Opacity.
- Enable Noise Modifier with the waveform button at the bottom of the editor.
- Use the displayed Amp and Speed to adjust the amount and speed of the variation.
- Toggle it on and off at the same frame, checking the curve and the target’s appearance.
For Layer 11 opacity, disabling noise restored the background cat and surrounding artwork at a frame where they disappeared with noise enabled. For properties that strongly affect visibility, also check the value curve.
Related articles
Section titled “Related articles”Verification
Section titled “Verification”- Hands-on verified: Compared the Keyframe and Curve views of the same Symbol 23 and selected property. Moved the Position X key from frame 57 to 49; other properties retained their frame-57 keys. The saved file also contains an X curve key at relative time 32.
- Unverified: Limited to this object, the view comparison, and this key move. Creating keys, whole-layer animation, Noise, Stepped Tween, other key modes, reopening, export, Windows, and the rest of the article were not rechecked.
- Evidence records: F-20261017-504