
Curve Editor
Verification record: Umoupen 0.9.61 build 652 (2026-10-17) · Verification scope
The Curve Editor adjusts how tween values change using curves. Easing describes how a change progresses over time between keys. You can keep the start and end positions while making motion start slowly or slow down near the end.
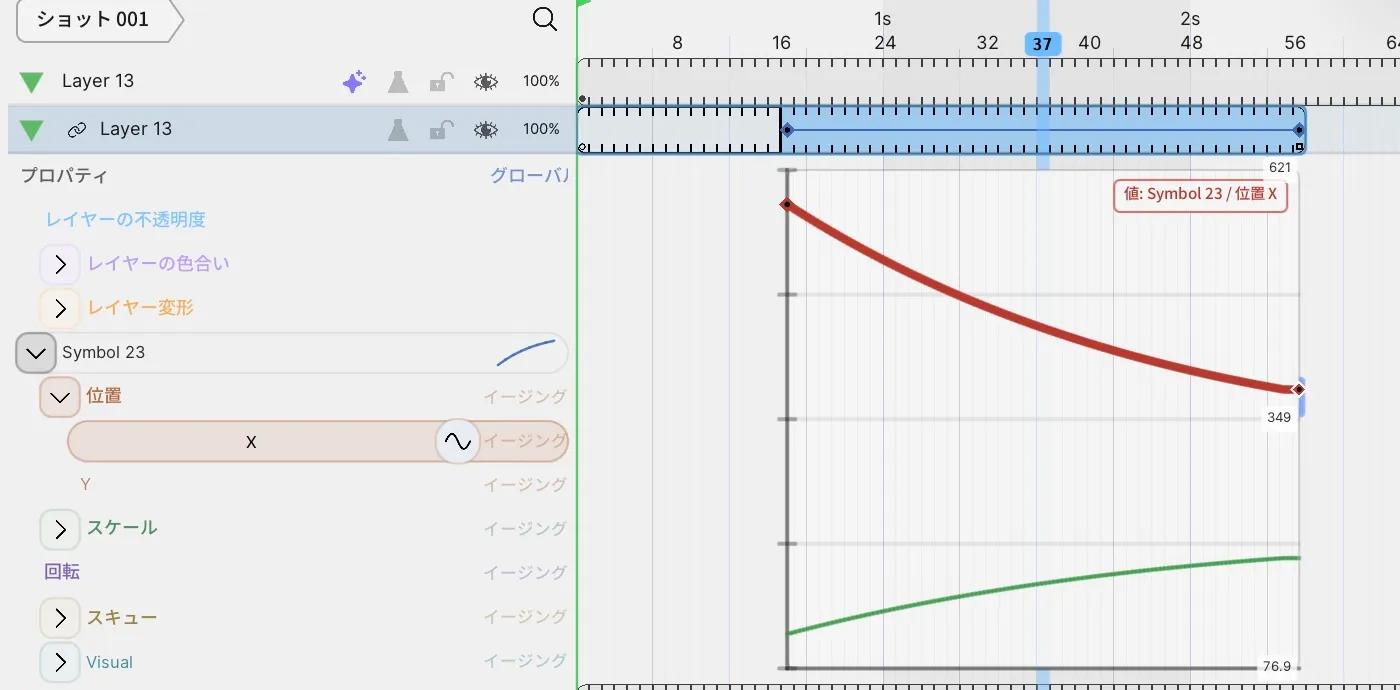
Location: Timeline → Tween Editor / Curve Editor
What you need first
Section titled “What you need first”- A Symbol or Text object with at least two tween keys. To move a whole layer, a layer with keys on Layer Transform or a similar layer value
- An interval where Tween is enabled in the Timeline
If there is no motion yet, first create the start and end states in Tween.
Adjust one property at a time
Section titled “Adjust one property at a time”- Select the layer containing the Tween you want to adjust.
- Open the Tween Editor and show the Curve Editor.
- In the Properties list, choose one property to adjust. Symbol values are under the Symbol name heading; whole-layer values are in the upper part.
- Select the line between two keys or select a key, then move its curve handles or control points.
- To keep the start and end states, leave the endpoint keys in place and adjust the handles between them.
- Play the interval and make small adjustments until the timing is right.
Example: start slowly
Section titled “Example: start slowly”This comparison changes the same Symbol’s Position X from Linear to Ease In. The start remains on frame 17 and the end on frame 57.
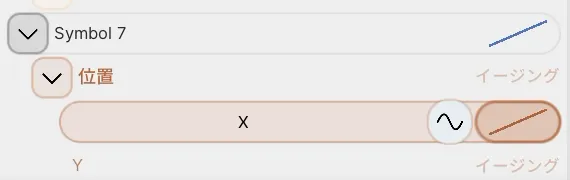
- Move the playhead between the two keys.
- Expand Position under the Symbol name and click the waveform button on the X row.
- Choose Ease In and play the interval. The movement starts small and gets larger toward the end.
Linear
Ease In
Read the Properties list
Section titled “Read the Properties list”The Properties list on the left of the Tween Editor shows every tweenable value of the selected layer in one list. The upper part holds values for the whole layer; the lower part holds values for each Symbol placed on the layer.
| Part | Items | What moves |
|---|---|---|
| Upper | Layer Opacity, Layer Tint, Layer Transform (Position X / Position Y / Scale X / Scale Y / Rotation / Skew) | The whole layer |
| Lower | Under each Symbol name heading: Position / Scale / Rotation / Skew / Visual | The Symbol under that heading |
The upper items are always listed, even without keys. Global sits to the right of the list heading, and Ease sits at the right of each row.
Position X and Position Y appear in both parts. To refine a Symbol’s motion, open Position under that Symbol’s name heading. Selecting a Symbol on the canvas or a layer row in the Timeline does not change the list.
Colors belong to the kind of item, not to the Symbol that owns it. For example, the Layer Transform heading and a Symbol’s Position are both orange.
Read the curve
Section titled “Read the curve”The Curve Editor can show Value or Easing. Read the name inside the graph and the vertical-axis scale to tell them apart. The comparison with the Keyframe Editor shows both views of the same object.
| Display | Where to select it | Meaning of the vertical axis |
|---|---|---|
| Value: Symbol 23 / Position X, for example | A value such as Position → X under the symbol name | The property’s numeric value; X decreases in the opening example |
| Easing: Global | Global at the top of the list | Interpolation progress; the pictured scale runs from 0.00 to 1.00 |
In a value curve, time runs horizontally and position, scale, rotation, or another property runs vertically. A steeper slope in either direction means a larger change in less time. A descending curve still represents change; a flat segment means that property barely changes. The Position X graph alone does not show motion along Y.
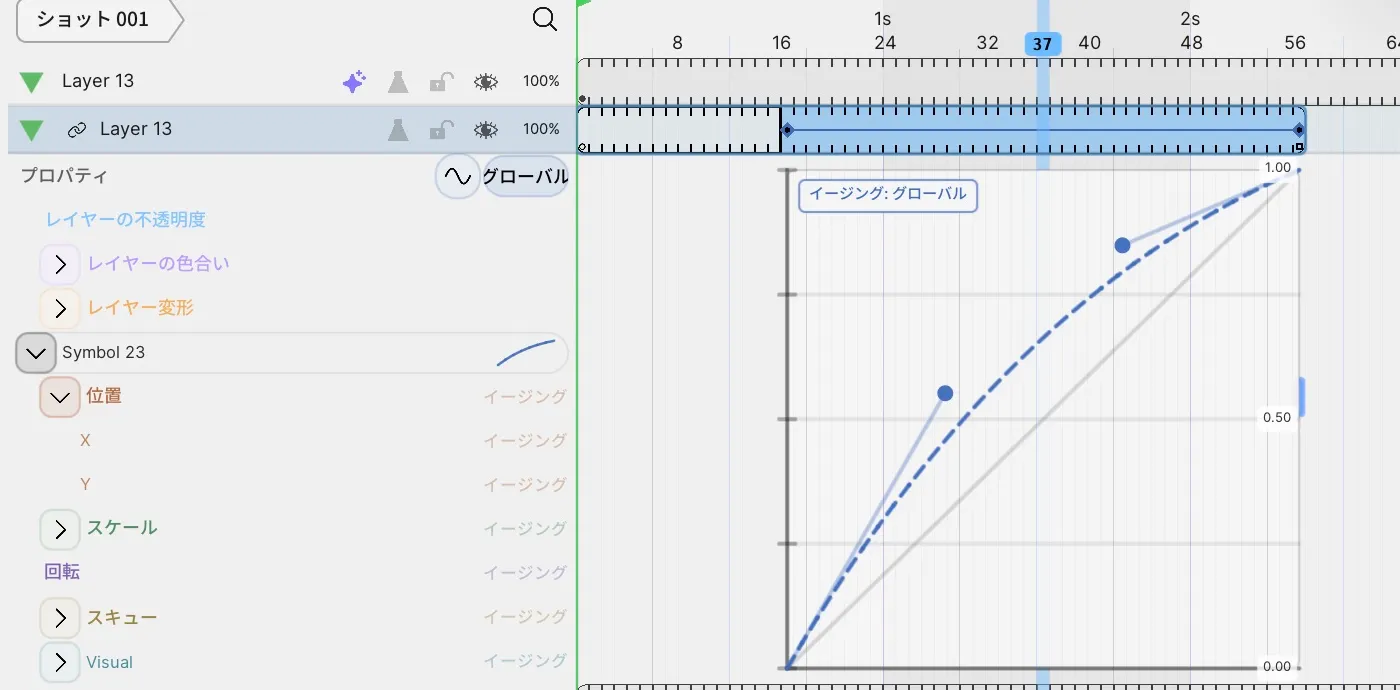
This graph represents how change progresses between keys, rather than position coordinates. To read X values, select Position → X under the target symbol instead of reading the Global graph. To apply easing to X alone, use the waveform button in the example above.
Change progress with a handle
Section titled “Change progress with a handle”This shows the result of lowering the start-side handle of Easing: Global above. The earlier key move was undone first, restoring the start to frame 17 and the end to frame 57.
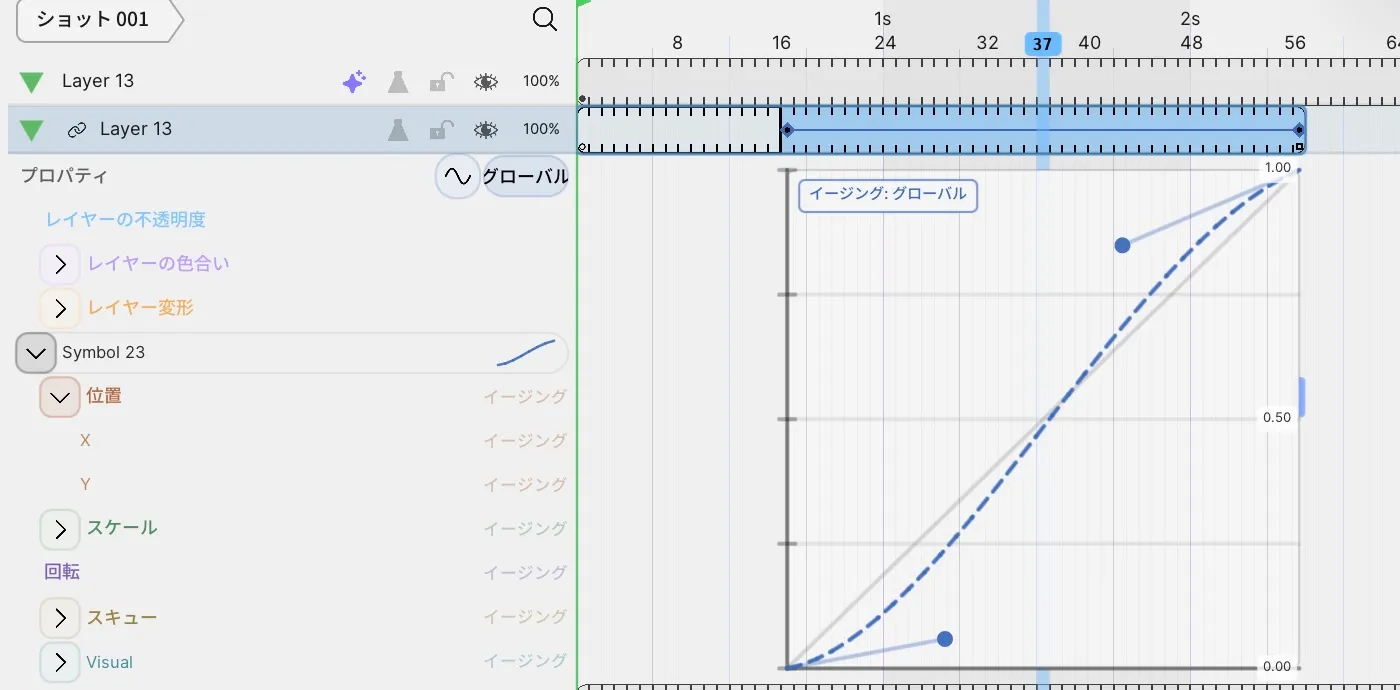
- In the Curve Editor, select Global.
- Drag the round handle extending from the start of the curve. Keep the endpoint itself in place.
- Set the playhead to the same intermediate frame and compare the display before and after the adjustment.
In this example, the start and end times and values stayed the same, while the intermediate display at frame 37 changed. Adjusting Global differs from adjusting Position X alone. To adjust X alone, select Easing on that row.
Moving a key in time changes a property’s timing boundaries. Moving an easing handle changes how the transition progresses within those boundaries.
Key modes
Section titled “Key modes”Key modes determine how keys are organized. Keyframe Editor / Curve Editor selects the editing view and is a separate setting.
| Mode | Use |
|---|---|
| Simple Tween Keys | Adjust the overall motion using only the main keys. |
| Property Tween Keys | Manage keys separately for each property. |
Switch between key modes with Advanced Tween Keying and Simple Tween Keys on the Timeline toolbar.
Custom Curve adjusts the curve for each interval directly.
Use Clear Current Tween Point, Move Tween Keys, and Delete Tween Keys to organize the keys.
When you right-click a point
Section titled “When you right-click a point”Right-click a point on the curve and the menu offers items that adjust only that point.
| Item | What it does |
|---|---|
| Reset Handles | Returns the curve handles to their starting direction and length. |
| Smooth Handles | Lines up the handles on both sides of the point so the curve passes through without a corner. |
| Linear Segment | Makes the segment next to the point a straight line instead of a curve. |
| Remove Point | Deletes the selected point; the same item removes several selected points. |
If it does not work
Section titled “If it does not work”| Symptom | Check this first |
|---|---|
| No curve or key appears | Select the layer that holds a Symbol or Text object with a Tween, then expand its row. |
| You cannot find a Symbol’s position curve | When the panel under the Tween Editor is short, only the upper part of the list (whole-layer values) is visible. Make the panel taller or scroll the list, then open the Symbol name heading. |
The curve label is an upper-part name such as Layer Tint / Amount | You are looking at a whole-layer value. To move a Symbol, choose an item under its Symbol name heading. |
| You cannot tell where to move a handle | Show one property, then select a key or the line between two keys. |
| There are too many lines to identify the active one | Show and adjust position, scale, and rotation one at a time. |
| Editing the curve does not change the motion | Confirm that Tween is enabled in the Timeline and that the playback range contains both keys. |
| You deleted too many keys | Undo immediately, then confirm the property and selected keys before deleting again. |
Related articles
Section titled “Related articles”Verification
Section titled “Verification”- Hands-on verified: Displayed the Position X value curve and Global easing for the same Symbol 23. Moved the start-side Global handle; the frame-37 display changed while the frame-17/57 times and start/end values were preserved, checked in the app and saved file.
- Unverified: Limited to this object, the Global handle adjustment, and view comparison. Per-row easing, presets, key modes, individual context-menu actions, reopening, export, Windows, and the rest of the article were not rechecked.
- Evidence records: F-20261017-504